Find my kits here

Tasha's Playground Fan Page
Find me on Facebook
My Personal CT


Saturday, October 27, 2012

Wrap up those winter taggies with this great new kit!! This tagger sized kit has 61 unique elements and 13 great papers. Personal Use only, do not share.

Supplies:
Kit- Sea Spray by A Taggers Scrap. You can find this awesome kit at SATC here.
Tube- Decent Descent by Jay Trembly. You can purchase this gorgeous tube at SATC here. You need a valid license to use this artwork.
Template-Temp126-Leah here
Font- TheNautiGal
Photoshop CS5
I'm on a Mac, so when I use Command you may need to use Ctrl
Here we go :)
Open your template. Image>Duplicate. Close out original. Delete credit and splatter layers.
Place paper 16 above bg layer. Right click paper and Create Clipping Mask. This will shape the paper to your template layer.
Clip paper 13 to rect 2.
Colorize circle 2 to #184400 or color of choice. Filter>Noise>Add Noise 15%. Add drop shadow.
Colorize rect 1 to #062151.
Colorize circle 1 to #062151. Filter>Brush strokes>Crosshatch-

Clip tube close up to circle. Change blend mode to Screen, Opacity 50%.
Drop shadow circle 1.
Colorize border 1 to #184400 and add noise at 50%.
Add tube of choice above border. Command+J to duplicate.
On top tube, Filter>Blur>Gaussian Blur 2px. Change blend mode to Screen, Opacity 50%.
Drop shadow bottom tube layer.
Add elements from the kit to your tag.
bow 5
waves
shells
shell 8
lantern
starfish- duplicate, reposition
Add drop shadows to all the elements except waves and starfish.
Image>Trim>Transparent Pixels to get rid of the extra space.
Image>Image Resize if needed.
Add tube license and copyright info.
Add name and any text of choice.
Merge, save and enjoy!!
Thank you for trying my tut :o) If you have any questions or would like to show me your results, feel free to email me at bananas_68@yahoo.com, or contact me on Facebook (link on left of blog).
Friday, October 26, 2012

Supplies:
Kit- Kitsune by Gimptastic Scraps. Visit her blog here for this stunning kit.
Tube- I'm using the work of Fumiko Barrows. I purchased this tube from Dreamscape Imaging when they were open, but you can now find her work at The PSP Project here.
Mask of choice
Font of choice (I used Carpenter Script)
Photoshop CS5
I'm on a Mac, so when I use Command you may need to use Ctrl
Here we go :)
Open a new canvas 700x700
Place frame 4 in center of canvas.
Place paper 4 beneath the frame.
Using your magic wand tool (w) click inside frame..make sure to get in all the little
nooks and crannies :)
Select>Modify>Expand by 3 px. Select>Inverse.
Hit delete on paper layer, deselect.
Open layer styles and add drop shadow to frame.
Place tube above frame and drop shadow.
I used the eraser tool (Soft Round) and softened up the edges of the tube a bit.
Open Snow 1. Command+J to duplicate a few times. Flip and reposition around the tube so
it appears she is sitting in the snow.
Add elements from the kit to your tag:
*from bottom to top*
bridge
branch 4
lantern
copy branch 4 (resized)
Flower 4
Leaf 1
Snowball- duplicate, resize, reposition
Add drop shadows to elements.
Now let's get our mask ready! Open your mask on a new canvas.
Add a new layer above it, and flood fill with color of choice,
or use a paper from kit .
Make sure your mask layer is activated and Command+A to Select All, Command+C to Copy.
Activate the paper layer, hit Q to turn on Quick Mask mode.
Command+V to paste the mask..it should now be tinted red.
Hit Q to turn off Quick Mask mode and there should now be marching ants on your canvas.
Hit the Add Layer Mask button at the bottom of the layer palette (rectangle with the circle in it)
Right click- convert to smart object
Right click- Rasterize layer
Drag completed mask to your tag canvas as the bottom layer
Resize it if needed.
With your Rectangular Marquee Tool (m), draw out a selection around the entire
tag, just slight smaller than the canvas. Image>Crop.
This will get rid of any stray pixels or drop shadows you don't see.
Image>Trim>Top Left Pixel Corner to remove the excess space.
Add your license and copyright info to the tag.
Add name and any other text of choice.
Merge, save as PNG and enjoy :)
Thank you for trying my tut. If you have any questions or would like to show me your results, feel free to email me (bananas_68@yahoo.com) or post them on my Facebook :)
Saturday, October 20, 2012

*click tag to view original size*
I played with a super fun tube called "Frankie" by Nocturne. You can find this tube at PFD here. This is a multi-layered tube and can be used for Halloween or anytime of the year!!
Friday, October 19, 2012
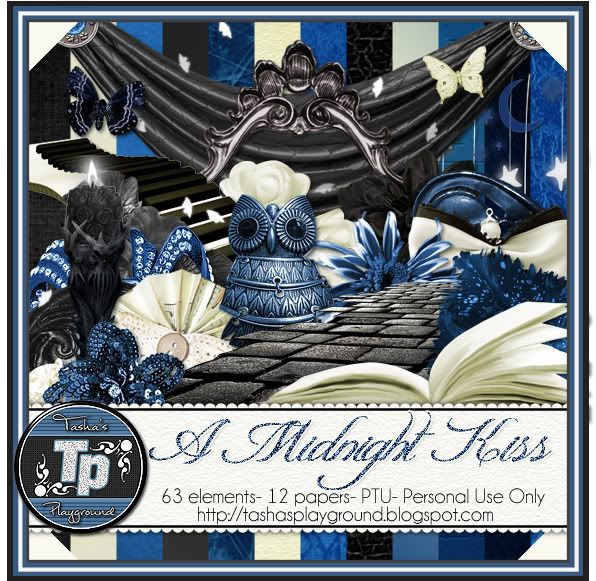
A Midnight Kiss is a tagger sized kit inspired by the beautiful shades in the night sky. This kit has 63 elements and 12 papers, all in stunning shades of blues, cream and charcoal to inspire your creativity and envelope your tags in a midnight kiss. Personal Use only, do not share!!
You can find this kit in all of my stores, which are linked on the left of the blog :o)
Tag By Jessica You can visit Jessica Blog HERE

Tuesday, October 16, 2012

Punk You! is a fun new tagger sized kit perfect for those tags with attitude. You can pick this kit up in any of my stores listed to the left of my blog. I'd love to see anything you make with it, just send me an email to bananas_68@yahoo.com or find me on Facebook :o)

Supplies:
Kit- Bloody Puppet Show by A Taggers Scrap. This kit is perfect for those creepy Halloween tags, or just when you want to tag something more on the dark side! Visit her blog here for details on where you can get this great kit.
Tube- I've used the art of Kurama Phoenix. You can purchase this at CDO with a valid license.
Mask- WSL_Mask128 here
Font- Moonstone
Photoshop CS5
I'm on a Mac so when I use Command you may need to use Ctrl
Here we go :)
Open a new canvas 700x700
Place Gateway in center of canvas.
On the top left post, place deco 6.
Command+J to copy. Edit>Transform>Flip Horizontal.
Reposition to top right post.
Place Frame 8 on canvas.
Command+T to Free Transform, angle the frame to the right.
Place paper of choice below the frame. I used Paper 9 and placed it
so that creepy eye was peeking out the frame :)
Click inside the frame with the Magic Wand Tool.
Select>Modify>Expand by 5. Select>Inverse.
Hit Delete on the paper layer. Deselect.
Now add some elements from the kit to your tag.
Refer to my tag for placement or just do your own thing:
(From bottom to top)
books
web
cage
heart
candle 4
candle 2
candles 2
cocktail
candle 1
flower
Place tube and add drop shadows where you see fit.
Now let's get our mask ready! Open your mask on a new canvas.
Add a new layer above it, and flood fill with color of choice,
or use a paper from kit .
Make sure your mask layer is activated and Command+A to Select All, Command+C to Copy.
Activate the paper layer, hit Q to turn on Quick Mask mode.
Command+V to paste the mask..it should now be tinted red.
Hit Q to turn off Quick Mask mode and there should now be marching ants on your canvas.
Hit the Add Layer Mask button at the bottom of the layer palette (rectangle with the circle in it)
Right click- convert to smart object
Right click- Rasterize layer
Drag completed mask to your tag canvas as the bottom layer
Resize it if needed.
With your Rectangular Marquee Tool (m), draw out a selection around the entire
tag, just slight smaller than the canvas. Image>Crop.
This will get rid of any stray pixels or drop shadows you don't see.
Image>Trim>Top Left Pixel Corner to remove the excess space.
Add your license and copyright info to the tag.
Add name and any other text of choice.
Merge, save as PNG and enjoy :)
Thank you for trying my tut. If you have any questions or would like to show me your results, feel free to email me (bananas_68@yahoo.com) or post them on my Facebook :)
Sunday, October 14, 2012

Hey all!!! I have a brand new kit in stores today :o) This is a vibrant fall kit with gorgeous shades of blue, red, yellow, green and brown! It's a tagger sized kit with 13 papers and 66 different elements. Kit is for Personal Use only, please don't share!!! You can find this great kit in any of my stores, which are listed on the left side of my blog. I'd love to see anything you make with my kit, just email me (bananas_68@yahoo.com) or friend me on Facebook (button on left side of blog). Enjoy and happy tagging :o)
Saturday, October 13, 2012

Supplies:
Kit- Tasha's Halloween from Amy here. Thanks Amy for making me this great kit!!!! You rock my socks lmao :o)
Tube- I'm using 2 tubes by Ismael Rac here. You need to purchase these and have a valid license to use them.
Template- kktempshalloween3-kk12 from Kandi Kissez here
Mask- WSL_Mask141 here (you can find bulk downloads on the right)
Font- October Crow
Photoshop CS5
I'm on a Mac, so when I use Command you may need to use Ctrl.
Here we go :)
Open up your template. Image>Duplicate. Close out original.
Delete the credits and green circle 1 layer.
We're going to work the template from bottom to top.
Add Paper 4 above the Large Black Circle layer.
Right-click paper layer>Create Clipping Mask. Your paper should now
fit nicely on the template layer :)
Small Black Circle-Filter>Noise>Add Noise 50%, Uniform, Monochromatic.
Purple Circle 2- Command+U to bring up Hue/Saturation. Increase Lightness to 100% or colorize to your choice of color. Hold Command and click the on the layer thumbnail to create a selection.
Select>Modify>Expand 3x. Add a new layer and fill with orange (#db7b31).
Command+F to repeat Add Noise from earlier.
Deselect and drag layer below Purple Circle 2.
Repeat these steps with Purple Circle 1 and Purple Square.
Black tab- Add Noise
Orange Circle- fill with Reflected Gradient. Add your tube close up and clip to the gradient layer.
Change tube Blend Mode to Soft Light. Expand and add a new Noise layer like earlier.
Green square- Paper 4
Black square- Paper 1
Kandi word art- Colorize
Add your tube of choice below the word art.
Add some elements from the kit to your tag. From bottom to top I used-
spider dangle
WA- colorize
bats
pub sign
bow
pumpkins
spider pole
treats
Add drop shadows to tube, elements and template layers.
Now let's get our mask ready! Open your mask on a new canvas.
Add a new layer above it, and flood fill with color of choice,
or use a paper from kit .
Make sure your mask layer is activated and Command+A to Select All, Command+C to Copy.
Activate the paper layer, hit Q to turn on Quick Mask mode.
Command+V to paste the mask..it should now be tinted red.
Hit Q to turn off Quick Mask mode and there should now be marching ants on your canvas.
Hit the Add Layer Mask button at the bottom of the layer palette (rectangle with the circle in it)
Right click- convert to smart object
Right click- Rasterize layer
Drag completed mask to your tag canvas as the bottom layer
Resize it if needed.
With your Rectangular Marquee Tool (m), draw out a selection around the entire
tag, just slight smaller than the canvas. Image>Crop.
This will get rid of any stray pixels or drop shadows you don't see.
Image>Trim>Top Left Pixel Corner to remove the excess space.
Add your license and copyright info to the tag.
Add name and any other text of choice.
Merge, save as PNG and enjoy :)
Thank you for trying my tut. If you have any questions or would like to show me your results, feel free to email me (bananas_68@yahoo.com) or post them on my Facebook :)
Friday, October 12, 2012

Supplies:
Kit- Blood Purple by Soxsational Scraps. Visit Soxie's blog here for info on this stunning kit.
Tube- I'm using a tube by Misticheskaya which you can get by joining their Exclusive club. You can find the rest of her tubes at PFD here.
Mask- Vix_MaskHalloween0905 here
Font- Expresiva here
Photoshop CS5
I'm on a Mac, so when I use Command you may need to use Ctrl
Here we go :)
Open a new canvas 700x700.
First let's get our mask ready.
Open your mask and paper 4. Place the paper as the layer above your mask.
On the mask layer, Select>Select All. Edit>Copy.
On the paper layer, Select>Edit in Quick Mask Mode (Q).
Edit>Paste. Hit Q to deselect Quick Mask Mode.
Hit the Add Layer Mask button at the bottom of the layer palette.
Right-click>Convert to Smart Object. Right-click>Rasterize Layer.
Drag mask over to your tag canvas and center it.
Add close up of tube above mask. Right-click and Create Clipping Mask.
Change blend mode of tube to Luminosity, Opacity 40%.
Add the following elements from bottom to top.
Refer to my tag for placement, or just do your own thing-
Blood 3
Moon
Fog
Blood Puddle
Coffin
Car
Blood Vials
Blood Print
Dagger
Candle
Spider
Skull Heart
Add your tube below the Candle layer.
Duplicate. On top tube layer, Filter>Blur>Gaussian Blur 2px.
Blend Mode-Screen, Opacity-45%.
Add drop shadow to bottom tube layer and elements.
With your Rectangular Marquee Tool (m), draw out a selection around the entire
tag, just slight smaller than the canvas. Image>Crop.
This will get rid of any stray pixels or drop shadows you don't see.
Image>Trim>Top Left Pixel Corner to remove the excess space.
Add your license and copyright info to the tag.
Add name and any other text of choice.
Merge, save as PNG and enjoy :)
Thank you for trying my tut. If you have any questions or would like to show me your results, feel free to email me (bananas_68@yahoo.com) or post them on my Facebook :)
Tuesday, October 9, 2012

Supplies:
Kit- Autumn Dust by Joy Design. You can find this cute kit at Twilight Scraps here.
Tube- I'm using the artwork of Cute Loot which you can purchase at The PSP Project here. You must have a valid TPP license to use this tube!
Mask- BD-Mask 3 from Bluedream Designs here
Font- Mardian
Photoshop CS5
I'm on a Mac, so when I use Command you may need to use Ctrl
Here we go :)
Open a new canvas 700x700
Place element 44 in the center of the canvas.
Position paper15 behind it and resize it so it doesn't extend beyond the frame.
Behind the paper, add element 47 so it shows a bit over the top of the frame.
Add element 46 to the top left corner of the frame.
Along the bottom of the frame add the following elements:
12
21
26
29
32
33
37
43
45
Double click one of the elements to bring up Layer Styles. Add drop shadow of choice.
Now right-click that element, Select Similar Layers. Right-click again. Paste Layer Style.
That should add your drop shadow to the remaining elements.
Add tube of choice to center of tag. Apply drop shadow.
Now let's get our mask ready! Open your mask on a new canvas.
Add a new layer above it, and flood fill with color of choice,
or use a paper from kit .
Make sure your mask layer is activated and Command+A to Select All, Command+C to Copy.
Activate the paper layer, hit Q to turn on Quick Mask mode.
Command+V to paste the mask..it should now be tinted red.
Hit Q to turn off Quick Mask mode and there should now be marching ants on your canvas.
Hit the Add Layer Mask button at the bottom of the layer palette (rectangle with the circle in it)
Right click- convert to smart object
Right click- Rasterize layer
Drag completed mask to your tag canvas as the bottom layer
Resize it if needed.
With your Rectangular Marquee Tool (m), draw out a selection around the entire
tag, just slight smaller than the canvas. Image>Crop.
This will get rid of any stray pixels or drop shadows you don't see.
Image>Trim>Top Left Pixel Corner to remove the excess space.
Add your license and copyright info to the tag.
Add name and any other text of choice.
Merge, save as PNG and enjoy :)
Thank you for trying my tut. If you have any questions or would like to show me your results, feel free to email me (bananas_68@yahoo.com) or post them on my Facebook :)
Subscribe to:
Posts
(Atom)
My Blinkies


I Get Creative For
