Search
Sign up for my Newsletter
Tasha's Playground Fan Page
Find me on Facebook
Followers
Saturday, October 13, 2012
Supplies:
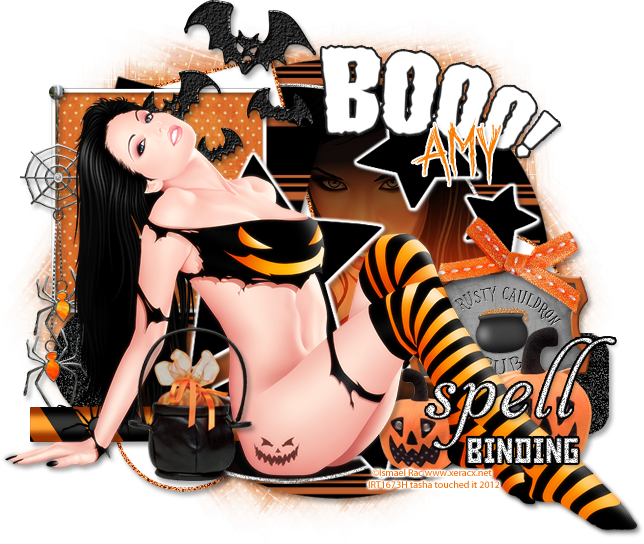
Kit- Tasha's Halloween from Amy here. Thanks Amy for making me this great kit!!!! You rock my socks lmao :o)
Tube- I'm using 2 tubes by Ismael Rac here. You need to purchase these and have a valid license to use them.
Template- kktempshalloween3-kk12 from Kandi Kissez here
Mask- WSL_Mask141 here (you can find bulk downloads on the right)
Font- October Crow
Photoshop CS5
I'm on a Mac, so when I use Command you may need to use Ctrl.
Here we go :)
Open up your template. Image>Duplicate. Close out original.
Delete the credits and green circle 1 layer.
We're going to work the template from bottom to top.
Add Paper 4 above the Large Black Circle layer.
Right-click paper layer>Create Clipping Mask. Your paper should now
fit nicely on the template layer :)
Small Black Circle-Filter>Noise>Add Noise 50%, Uniform, Monochromatic.
Purple Circle 2- Command+U to bring up Hue/Saturation. Increase Lightness to 100% or colorize to your choice of color. Hold Command and click the on the layer thumbnail to create a selection.
Select>Modify>Expand 3x. Add a new layer and fill with orange (#db7b31).
Command+F to repeat Add Noise from earlier.
Deselect and drag layer below Purple Circle 2.
Repeat these steps with Purple Circle 1 and Purple Square.
Black tab- Add Noise
Orange Circle- fill with Reflected Gradient. Add your tube close up and clip to the gradient layer.
Change tube Blend Mode to Soft Light. Expand and add a new Noise layer like earlier.
Green square- Paper 4
Black square- Paper 1
Kandi word art- Colorize
Add your tube of choice below the word art.
Add some elements from the kit to your tag. From bottom to top I used-
spider dangle
WA- colorize
bats
pub sign
bow
pumpkins
spider pole
treats
Add drop shadows to tube, elements and template layers.
Now let's get our mask ready! Open your mask on a new canvas.
Add a new layer above it, and flood fill with color of choice,
or use a paper from kit .
Make sure your mask layer is activated and Command+A to Select All, Command+C to Copy.
Activate the paper layer, hit Q to turn on Quick Mask mode.
Command+V to paste the mask..it should now be tinted red.
Hit Q to turn off Quick Mask mode and there should now be marching ants on your canvas.
Hit the Add Layer Mask button at the bottom of the layer palette (rectangle with the circle in it)
Right click- convert to smart object
Right click- Rasterize layer
Drag completed mask to your tag canvas as the bottom layer
Resize it if needed.
With your Rectangular Marquee Tool (m), draw out a selection around the entire
tag, just slight smaller than the canvas. Image>Crop.
This will get rid of any stray pixels or drop shadows you don't see.
Image>Trim>Top Left Pixel Corner to remove the excess space.
Add your license and copyright info to the tag.
Add name and any other text of choice.
Merge, save as PNG and enjoy :)
Thank you for trying my tut. If you have any questions or would like to show me your results, feel free to email me (bananas_68@yahoo.com) or post them on my Facebook :)
Subscribe to:
Post Comments
(Atom)
Leave me some love
Labels
- A Space Between
- A Tagger's Scrap
- Abstract Creations
- Alena Lazareva
- Andreea Cernestean
- animated
- Announcement
- Autumn
- Autumn Blaze
- Autumn Breeze
- awards
- Birthstone Series
- blog train
- Cartoon Pink
- CDO
- Christmas
- Cluster Frame
- CT call
- Ct Tag
- Ct Team
- Cuddly Rigor Mortis
- dark/goth
- Designer Scraps
- Digital Chaos
- Dirk Richter
- DSI
- Elias Chatzoudis
- Enys Guerrero
- FB Timeline Cover
- Fluff
- Forum Set
- FourXDesigns
- freebie
- FTU CU
- FTU kit
- FTU tut
- Full Size Kit
- Gimptastic Scraps
- Gorjuss
- Halloween
- IB kit
- Keith Garvey
- KiwiFireStorm
- Lollipops N Gumdrops
- Molly Harrison
- New Years
- No Scrap
- PFD
- Photoshop tut
- Pimpin PSPers
- Previously Released
- PTE
- PTU CU
- PTU kit
- PTU tut
- quick page
- Rebecca Sinz
- Rosanna Castellino
- sale
- Sarah's Tags N Things
- Scrap-U-Nique
- Shawli
- Sheena Pike
- snaggable
- Soxsational Scraps
- Spazzd Art
- spring
- St. Patrick's Day
- Standalone kits
- summer
- Summer Haze
- tag show off
- tags
- tags with my kits
- tags with my templates
- Tasha's CT
- template
- Thanksgiving
- TPP
- tut result
- Twilight Scraps
- Valentine
- Whispered Bliss
- Wicked Princess Scraps
- Winter
- wordart
Blog Archive
-
▼
2012
(213)
-
▼
October
(14)
- Hot Winter- New Kit!!
- Decent Descent- PTU
- Snow Princess- FTU
- CT tag show off!!!
- A Midnight Kiss- New Kit!!
- Punk You!!! New Kit :)
- Fallen- PTU
- DelightFall- New Tagger Kit!!
- Spellbinding- FTU
- Blood Purple- PTU
- Autumn Cutie- PTU
- Falling for Steampunk- FTU
- Poison- Limited time FTU tut
- New kit and Blog Train Freebie!!!
-
▼
October
(14)


0 comments:
Post a Comment