Search
Sign up for my Newsletter
Tasha's Playground Fan Page
Find me on Facebook
Followers
Sunday, July 31, 2011
Shani at Wicked Princess Scraps put together this blog train since there are so many pregnant mommas she knows right now! Make sure you swing by the other stops to pick up their parts. There was no pallette, just the Beautiful Baby theme :)
You can download my part here
Please continue on the train:
http://2irishbitchesdesigns.blogspot.com/
http://2irishbitchesdesigns.blogspot.com/
Labels:blog train,freebie,FTU kit | 3
comments
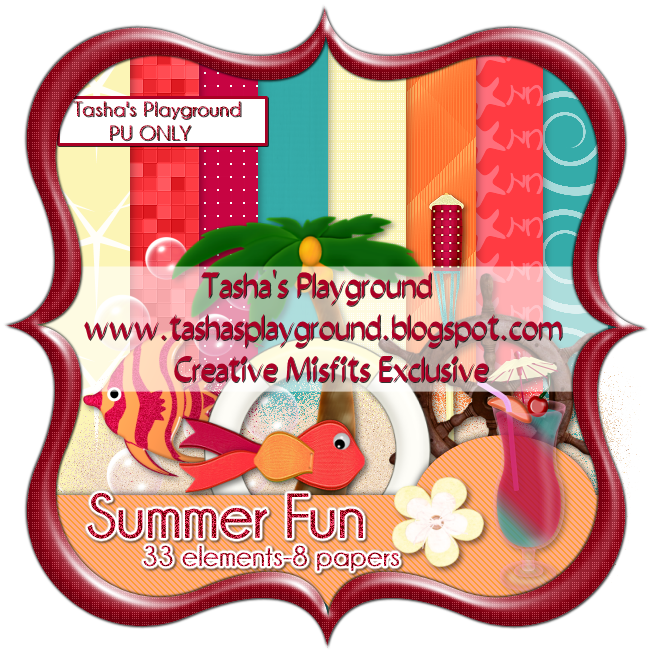
Last month, I joined in the Misfit monthly scrapkit challenge! We were given a pallette and theme to work with, and this is what I came up with!
You can grab my kit, and several others at the Creative Misfits blog here. I'd love to see anything you make with it!!!
Labels:FTU kit | 2
comments
Saturday, July 30, 2011
Labels:freebie,template | 4
comments
Supplies:
Elements of choice- I used from a couple different PTU kits, so cannont supply these
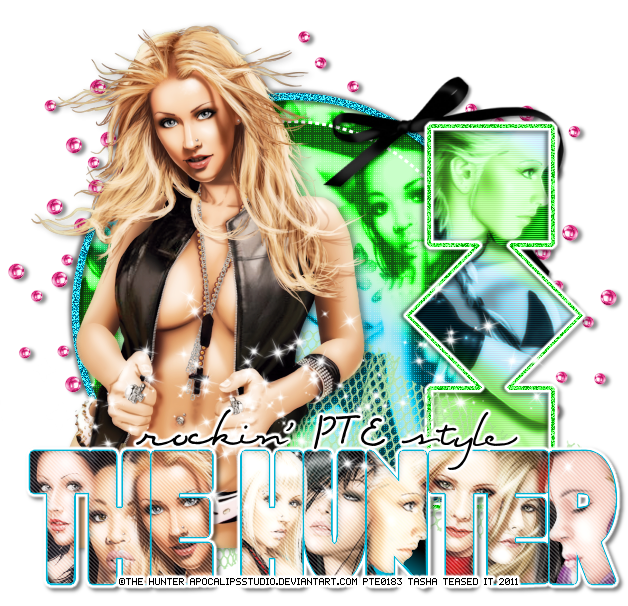
Tube- You'll want several tubes by the same artist. I used the amazing work of The Hunter available at PTE. You must have a valid license to use this artwork
Template- My own, template 2 here
Plug Ins- Xero>Radiance, Soft Mood, Porcelain; Penta.com>jeans, dots and cross; EC4>gradient glow; MuraMeister>copies; UnPlugged Tools>Interlace
Here we go :)
Open the template. Ctrl+D, close out original. Delete the credits layer. Delete all 3 rectangle layers
Highlight circle layer
selections>select all>float>defloat
add a new raster layer
flood fill with color or gradient of choice
c/p tube of choice onto canvas
MuraMeister>copies: wallpaper(rotate)
I used the default settings, apply
selections>invert
make sure tube layer is selected
hit delete on keyboard
deselect
delete original layer
On tube layer apply Xero>Radiance:
128, 50, 128, 185
Then apply penta.com>dots and cross:
72, 10, 2
change blend mode to Luminance
lower opacity to around 72
Highlight circle frame layer
Use your manual color correction tool and change to color of choice
add noise @ 100%, Uniform, Monochrome checked
add drop shadow
Merge your three square layers together
Highlight the new merged layer
selections>select all>float>defloat
selections>modify>select selection borders:
Inside/Outside, 4
add new raster layer
flood fill with color of choice
add same noise as before
add a fat, white gradient glow, width 3
add drop shadow
Highlight your merged square layers again
selections>select all>float>defloat
add new raster layer, flood fill with gradient
UnPlugged Tools>Interlace: 1, 127, 1, 0
add tube of choice inside selection
selections>invert
hit delete on your keyboard
deselect
delete original layer
On the tube layer, duplicate it
on top layer:
add a gaussian blur of 2,
change blend mode to Screen
lower opacity to 58
On bottom layer:
change blend mode to Luminance (L)
lower opacity to 80
Add main tube of choice
Xero>Porcelain:
70, 76, 137, 0, 0, 0
Duplicate tube layer twice
On middle layer:
Adjust>gaussian blur of 2
change blend mode to screen, opacity 54
On top layer:
Adjust>gaussian blur 2
change blend mode to hard light, opacity 30
Now for the words! I'll try to make this make sense, lol
Choose your WhoopAss font and type what you want
I used my raster deform tool to stretch it out, but try to keep it in proportion
convert to raster layer, and rename "back"
selections>select all>float>defloat
selections>modify>select selection borders
inside/outside, width 4
add new raster layer, flood fill with color of choice
deselect and move below the "back" layer
add a fat, white gradient glow, width 3
Now open one of your tubes, and using your clone tool, right click
on the part of the tube you want showing in the letters
Back to your canvas, add a new raster layer, and still using your clone tool
"paint" the tube on your blank raster layer, where you want it to show up
Repeat that with the rest of the tubes and letters,
a new raster layer on your canvas for each tube
Once you have that all done, merge all the cloned tube layers together
Select you "back" layer
selections>select all>float>defloat
selections>invert
highlight the merged tube layers
hit delete on your keyboard
deselect
Duplicate your tube layer
On the bottom layer:
Xero>soft mood:
7, 50, 50, 50, 9, 0
On the top layer:
change blend mode to screen, opacity 80
penta.com>jeans: 62, 4
Add any additional elements and text of your choice
Add drop shadows if you want
crop and resize your tag
add copyright and license info
merge, save, enjoy!
Thank you for trying my tut! If you have any questions, or would like to show me your results, please email me: bananas_68@yahoo.com
Labels:FTU tut,No Scrap | 0
comments
So, I made this template for a challenge at Siggy Showdown (this great forum where you can win up to $50 worth of tubes each quarter)...and I forgot to enter it in time to be voted on and put on the blog, lol!!! Typical Tasha!! So, I'm offering it up on my blog instead. Hope you like it, and I'd love to see anything you make with it!
Download here
Labels:template | 4
comments
Supplies:
Kit- "Guarding Elias" by Bello Scarto available for purchase here
Tube- I'm using the work of Elias available at PTE here. You must have a valid license to use this work
Mask- Gems_Mask187 here
Font- TheNautiGal
Plug Ins- EC4>Bevel Boss
Here we go :)
Open a new canvas 650x650
c/p paper 7 onto canvas
Layers>new mask layer>from image
apply mask, merge group
c/p element 13 onto canvas
use your magic wand tool and click inside the frame
selections>modify>expand by 5
selections>invert
c.p paper 12 as a new layer under frame
hit delete on your keyboard
c/p close up of tube as a new layer under frame
hit delete on your keyboard
deselect
on tube layer- change blend mode to Hard Light
Add main tube of choice
duplicate
on duplicate layer- gaussian blur of 3
change blend mode to Soft Light
drop shadow bottom tube layer
Add elements to your tag
I used:
18
15
33
3
19
17
I added a bevel boss to elements 18 and 17
Crop and resize your tag
add copyright and license info
add name and any text
merge, save, enjoy
Thank you for trying my tut! If you have any questions, or would like to show me your result, please email me: bananas_68@yahoo.com
Labels:PTU tut | 1 comments
Friday, July 29, 2011
Supplies:
Kit- "Original Sin" by A Tagger's Scrap. Visit her blog here for where you can purchase this kit.
Tube- I'm using a tube by Ismael Rac here. You must have a valid license to use this work.
Mask- Gems_Mask187 here
Template- CBN Template 126 here
Plug Ins- Xero>Porcelain, UnPlugged Tools>Interlace, EC4>gradient glow/bevel boss, penta.com>dots and crosses
Font of Choice
Here we go :)
Open your template, Ctrl+D, close out original
Delete © layer and Merged Shadow 1 layer
Highlight layer 13
Selections>select all>float>defloat
Selections>Invert
c/p paper 5 onto canvas
hit delete on keyboard, deselect
Highlight layer 11
repeat above steps with paper 5
Add a fat, white gradient glow, width 3
Highlight layer 10
penta.com>dots and crosses
72, 10, 2
Highlight layer 8
apply paper 1
EC4>Bevel Boss
settings of your choice
apply gradient glow
Repeat above steps with layer 7
Highlight layer 6
apply paper 3
before you deselect, insert close up of tube
hit delete
deselect
change blend mode of tube to Hard Light
and lower opacity to 72
UnPlugged>Interlace- default settings
Repeat above steps with layer 4
Highlight Layer 1
Use your magic wand tool and click each letter of the word Innocence
Use the manual color correction tool
and change to color of choice
add noise
Now add main tube of choice
Xero>Porcelain
33, 128, 134, 79, 43, 21
Decorate your tag with elements from the kit
I used:
ribbon 2
button
flower 1
flower 2
butterfly
lips
cap
boot
crop and resize tag
add copyright and license info
add name and any text
merge, save, enjoy!
Thank you for trying my tut. If you have any questions, or would like to show me your results, please email me- bananas_68@yahoo.com
Labels:A Tagger's Scrap,PTU tut | 0
comments
When I was tagging the kit "Pink Is The New Pink" by Designs by Tracy, I got inspired to try my first quickpage! I hope you all like it, and get some use from it :) You can visit Tracy's blog here and you can purchase this great kit here.
Download here
Labels:Designer Scraps,freebie,quick page | 0
comments
Wednesday, July 27, 2011
Supplies:
Kit- "Pink is the New Pink" by Designs by Tracy. This fun, girly kit is available at Designer Scraps here. The papers in here are my favorite!!
Tube- I'm using the work of Elias Chatzoudis available from PTE. You must have a valid license to use this artwork.
Font- Clarissa
Here we go :)
Open a new canvas 650x650
This is a full size kit, so you'll need to resize a bit.
c/p frame5 onto canvas and resize
Using your magic wand tool, click inside the frame
selections>modify>expand by 5
selections>invert
resize paper2 and c/p as a new layer under the frame
hit delete on your keyboard
deselect
open your tube of choice and place on canvas
duplicate, and move one copy under the frame
Using your eraser tool, erase the bottom of both tube layers.
You'll want it to appear she's coming out the frame
Now decorate your tag with elements from the frame
I used:
heart
star
ribbon2
leaves
heart splatter
glitter flower
bow2
flower4
add dropshadows and sharpen elements
crop and resize your tag
add your license and copyright info
add name and any text
merge, save, enjoy!
Thank you for trying my tut. If you have any questions, or would like to show me your results, please email me- bananas_68@yahoo.com
Labels:Designer Scraps,PTU tut | 0
comments
Monday, July 25, 2011
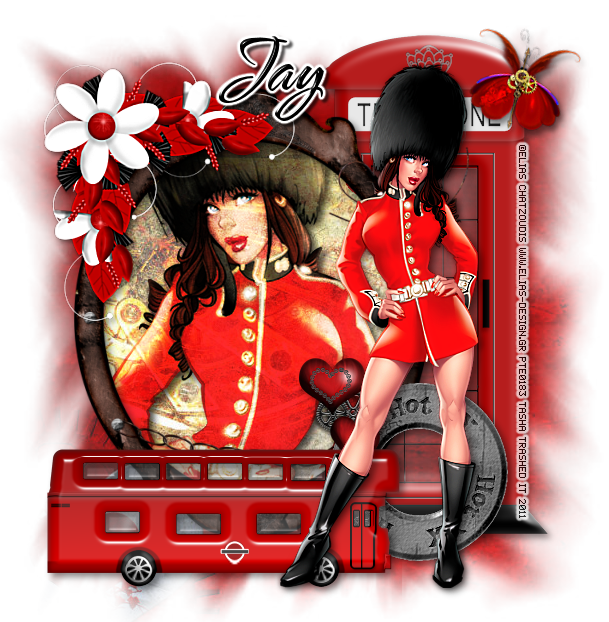
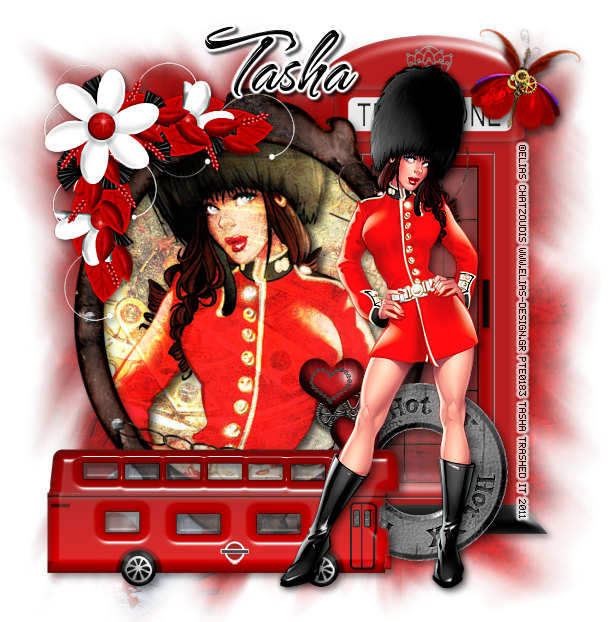
Here is a tag I made with Elias' hot new tube at PTE!! Being a military brat, I got to grow up in England, and loved when we made trips to London to see the sights. This tube is just amazing and I'm so glad he made it!!
Labels:tag show off | 0
comments
Sunday, July 24, 2011
Supplies:
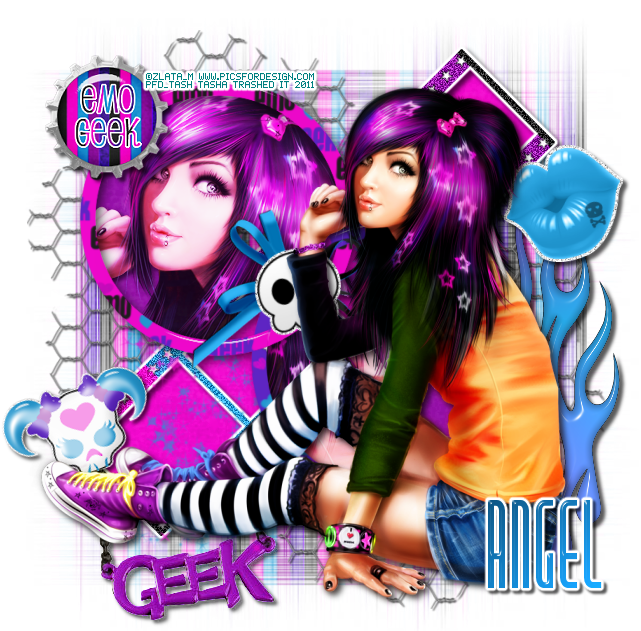
Kit- I'm using a very original and fun kit by Angel's Designz called "Emo Geek". This kit is available at Twilight Scraps here
Tube- I just love PFD, and am using another artist from them- Zlata_M. You must have a valid license to use this artwork.
Mask- I'm using Mask 4 by Leah over at Amy & Leah's Gimptastic Tuts here
Font- Pasta Palazo, a FTU here
Plug Ins- Xero>Radiance, EC4>Gradient Glow & Bevel Boss
Here we go :)
Open a new canvas 650x650
C/p paper 7 onto canvas
layers>new mask layer>from image
apply mask, merge group
c/p wire element onto canvas
resize and duplicate
image>flip. image>mirror
Add a slight drop shadow to make them stand out more
c/p flames above wires
EC4>Bevel Boss at your preferred settings
add a slightly heavier drop shadow
c/p film strip onto canvas
adjust>add noise about 45%
EC4>gradient glow:
width-3, fat, white
Select your magic wand tool and click inside each frame on the film strip
selections>modify>expand by 3
selections>invert
c/p paper 8 under film strip
hit delete on keyboard
deselect
drop shadow film strip
c/p necklace as a new layer under paper 8
resize and drop shadow
c/p sparkles onto canvas, resize and move above film strip
c/p frame 2 onto canvas
select your magic wand tool and click inside both frames
selections>modify>expand by 5
selections>invert
c/p paper 11 under frame
hit delete on keyboard
c/p tube close up above paper 11
hit delete on keyboard
deselect
drop shadow frame
On tube layer:
Xero>radiance-
default settings, but move beauty to 80
duplicate tube layer
on top layer- Screen, opacity 76
on bottom layer- Hard light, opacity 84
drop shadow bottom tube layer
Decorate your tag with any other elements.
I used:
skull 2- EC4>Bevel boss
bottle cap
lips
crop and resize tag
add copyright and license info
add name and any text
merge, save, enjoy!
Thank you for trying my tut. If you have any questions, or would like to show me your results, please email me: bananas_68@yahoo.com
Labels:PFD,PTU tut,Twilight Scraps | 0
comments
Supplies-
Kit- "Artist in Me" by A Tagger's Scrap. This is a very fun kit to play with!! Visit Jo's blog here to find out where you can purchase this kit.
Tube- I'm using a tube by Eugene Rzhevskii available at PFD. You must have a valid license to use this work.
Mask- mask 5_BrutalDesigns here (part of mask set 1)
Font of choice
Here we go :)
Open a new canvas 750x750
c/p paper 22 as a new layer onto canvas
layers>new mask layer>from image
apply mask, merge group
Add and resize sparkles
Add, resize and drop shadow butterflies
Add, resize and drop shadow buttonflowers
Select your picture tube tool and choose your lawn tube
add a new layer and create a lawn at the bottom of the tag
Add your tube on the lawn and add a drop shadow
Add your canvasandeasel element and add a drop shadow
Now decorate your canvas and lawn with elements from the kit
I used:
glitterpaint1
brushstrokes
glitterpaint4
handprints
brushes
deco5
paintpot1
paintpot5
paintpot4
Crop and resize your tag
add copyright and license info
add name and any text
crop, save, enjoy!
Thank you for trying my tut. If you have any questions or would like to show me your results, please email me: bananas_68@yahoo.com
Labels:A Tagger's Scrap,PFD,PTU tut | 0
comments
Wednesday, July 20, 2011
Supplies:
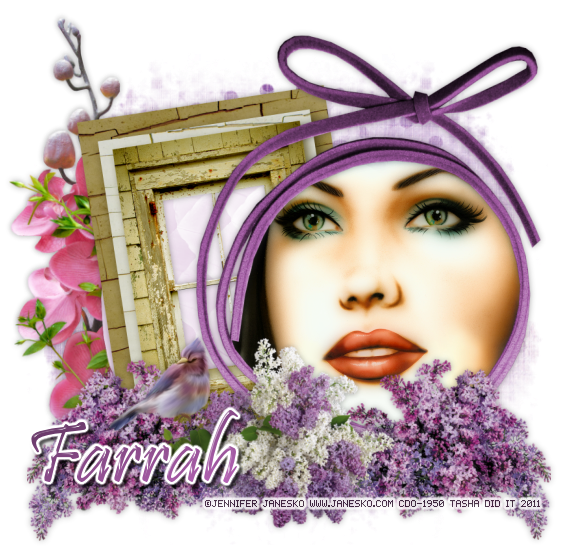
Kit- "Ever So Grateful" by Farrah's Designer Scraps. You can purchase this stunning kit here
Tube- I'm using the lovely work of Jennifer Janesko, availble at CDO. You must have a valid license to use this artwork.
Mask- Mask 34 by Brutal Designs here
Font of choice
Here we go :)
Open a new image 750x750
c/p paper 1 onto canvas
layers>new mask layer>from image
apply mask, merge group
Resize and add the following elements:
flower 5
leaves
ball
window
bow 4
flower 9- duplicate/mirror
flower 7
bird 1
highlight bow 4
using your magic wand tool, click inside the bow
selections>modify>expand by 4
c/p tube of choice under the bow layer
selections>invert
hit delete on your keyboard
deselect
crop and resize tag
add copyright and license info
add name and any text
merge, save, enjoy :o)
Thank you for trying my tut! If you have any questions, or would like to show me your results, please email me: bananas_68@yahoo.com
Labels:Designer Scraps,PTU tut | 0
comments
Supplies:
Kit- "Nani Kahakai" by Belle of the Ball. You can purchase this fab, summery kit here
Tube- I'm using the smoking hot work of Ismael Rac here. You must have a valid license to use this artwork.
Mask- HorsePlay's Pasture Mask 36 here. I just LOVE her masks :)
Font of choice
Here we go :)
Open a new canvas 700x700
c/p paper 12 onto canvas
Layers>new mask layer>from image
apply mask, merge group
c/p frame 1 onto canvas
using your magic wand tool, click inside the frame
selections>modify>expand by 5
c/p paper 7 as a new layer under the frame
selections>invert
hit delete on your keyboard
deselect
Open you tube of choice and c/p as a new layer above the frame
duplicate tube layer
on top layer, change blend mode to Multiply
lower opacity to about 75
merge down
duplicate tube layer again
move one copy below the frame
using your eraser tool, erase the bottom of both tube layers.
you want it to look like she's coming out the frame :)
Now decorate your tag with elements from the kit
I used:
sand
glitter ring spill
surfboard
sun
flower4
hibiscus
palm tree
wired heart
shoestring bow
drink
boat2
Hawaiian drink
Sharpen and drop shadow your elements
crop and resize your tag
add license and copyright info
add name and any text
merge, save, enjoy :)
Thank you for trying my tut! If you have any questions, or would like to show me your results, please email me: bananas_68@yahoo.com
Labels:PTU tut,Twilight Scraps | 0
comments
Saturday, July 16, 2011
Supplies-
kit- "Libby's Lullaby" by Wicked Princess Scraps. Visit her blog here to find out where you can purchase this beautiful kit. Right now, you can buy her store for $7!!!!!
Tube- I'm using the amazing work of Alfadesire, available at PFD. You must have a valid license to use this artwork.
Template- Temp 81 by Leah here
Mask- gemsmask-192 here
Font- Scriptina, a FTU font here
PlugIns- EC4-gradient glow, EC4-bevel boss, penta.com>jeans, xero>porcelain
Here we go :)
Open up your template, Ctrl+D, close out original
delete credit layer and bg layer
I resized the template, and then increased the canvas size..
but that's just me :)
Open pp11 and move to the bottom
layers>new mask layer>from image
apply mask, merge group
Apply papers from the kit to each layer.
To do this:
highlight a template layer
selections>select all>float>defloat
c/p paper above template layer
selections>invert
hit delete on keyboard
delete original layer
I used:
rect 2- pp7
rect 1- pp13
circle 2- pp12
circle 1- pp8
square 2- pp7
square 1- pp9
On each layer, apply a fat gradient glow, width 5, these settings:
Now, using your magic wand tool, highlight just the color portion of the glow.
adjust>add/remove noise>add noise at 80%
On your words layer:
penta.com>jeans:
amount-16, width-4
EC4>bevel boss:
width-5.76, height-50, smoothness-75
Now add your main tube of choice
xero>porcelain:
Now decorate your tag with elements.
I used:
blankie
motherandchildcameo
satinbow
tiedknot
pacifier
bassinet
lovebear
mooncloudstars
crop and resize your tag
add license and copyright info
add name and any text
merge, save, enjoy :)
Thank you for trying my tut. If you have any questions, or would like to show me your results, please email me: bananas_68@yahoo.com
Labels:PTU tut,Wicked Princess Scraps | 0
comments
Just wanted to show off the fab tut result Lynne sent to me :) Thank you for trying out my tut, and for your kind words as well!!
Labels:tut result | 0
comments
Supplies-
Kit of choice- "Summer Lilac" by KnC Scrapz. This kit is available at Lollipops N Gumdrops here. And it's on sale right now so go snatch it up :)
Tube of choice- I'm using an amazing tube by Misticheskaya available at PFD. You must have a valid license to use this artwork.
Mask- WSL_Mask219 here
Font- Waterfalls, a FTU font here
Here we go :)
Open a new canvas 650x650
c/p pp6 onto canvas
Layers>new mask layer>from image
apply mask, merge group
c/p frame onto canvas
Image>rotate>free rotate 90 degrees
Using your magic wand tool, click inside each frame
selections>modify>expand by 5
c/p pp1 as a new layer under the frame
selections>invert
hit delete on your keyboard
deselect
c/p main tube of choice onto canvas
resize and position in front of frame
add some elements to your tag
I used:
wreath1
dots
flower
flower1
flower3
flower4
flower6
grass
bfly
duplicate and resize the grass element a few times
place around your tube to create some depth to your tag :)
add slight drop shadows (0, 0, 35, 2)
crop and resize your tag
add license and copyright info
add name and any text
merge, save, enjoy!
Thank you for trying my tut. If you have any questions, or would like to show me your results, please email me: bananas_68@yahoo.com
Labels:Lollipops N Gumdrops,PTU tut | 0
comments
Sunday, July 10, 2011
Supplies-
Kit- "Dragon 1" by Toxic Desirez. This kit is available at Twilight Scraps here
Tube of choice- I'm using a tube by VeryMany available at PFD. You must have a valid license to use this artwork
Mask- DBV Masks133 here
Font- Roskrift a FTU here
Plug Ins- Xero>Soft Mood, Penta.com>jeans, EC4>gradient glow
Here we go :)
First open a new canvas 750x750
c/p paper24 onto canvas
layers>new mask layer>from image
apply mask, merge group
c/p frame2 onto canvas
using your magic wand tool, click inside each frame
selections>modify>expand by 5
add new raster layer under frame
flood fill with gradient of choice: angle 210, repeats 1
add close up of tube, arrange how you like
hit delete on keyboard
repeat a few times until you're satisfied :)
deselect
merge all your tube layers into one
Xero>Soft Mood
play with the sliders until you like the effect for your tube
I used: 5, 50, 50, 50, 9, 0
change blend mode to Luminance (L)
Penta.com>Jeans, default settings
add drop shadow to frame
Add main tube layer
duplicate
on top layer, change blend mode to screen
lower opacity to about 35
drop shadow bottom layer
Now decorate your tag with elements
drop shadow and sharpen as you use them
I used:
bow3
word art
doodle
geta shoes
flame swirl-duplicate, mirror
flower3
rice bowl
sparkles 1
crop and resize your tag if needed
add copyright and license info
add name and any text
merge, save, enjoy!
Thank you for trying my tut. If you have any questions, or would like to show me your results, please email me: bananas_68@yahoo.com
Labels:PFD,PTU tut,Twilight Scraps | 0
comments
Subscribe to:
Posts
(Atom)
Leave me some love
Labels
- A Space Between
- A Tagger's Scrap
- Abstract Creations
- Alena Lazareva
- Andreea Cernestean
- animated
- Announcement
- Autumn
- Autumn Blaze
- Autumn Breeze
- awards
- Birthstone Series
- blog train
- Cartoon Pink
- CDO
- Christmas
- Cluster Frame
- CT call
- Ct Tag
- Ct Team
- Cuddly Rigor Mortis
- dark/goth
- Designer Scraps
- Digital Chaos
- Dirk Richter
- DSI
- Elias Chatzoudis
- Enys Guerrero
- FB Timeline Cover
- Fluff
- Forum Set
- FourXDesigns
- freebie
- FTU CU
- FTU kit
- FTU tut
- Full Size Kit
- Gimptastic Scraps
- Gorjuss
- Halloween
- IB kit
- Keith Garvey
- KiwiFireStorm
- Lollipops N Gumdrops
- Molly Harrison
- New Years
- No Scrap
- PFD
- Photoshop tut
- Pimpin PSPers
- Previously Released
- PTE
- PTU CU
- PTU kit
- PTU tut
- quick page
- Rebecca Sinz
- Rosanna Castellino
- sale
- Sarah's Tags N Things
- Scrap-U-Nique
- Shawli
- Sheena Pike
- snaggable
- Soxsational Scraps
- Spazzd Art
- spring
- St. Patrick's Day
- Standalone kits
- summer
- Summer Haze
- tag show off
- tags
- tags with my kits
- tags with my templates
- Tasha's CT
- template
- Thanksgiving
- TPP
- tut result
- Twilight Scraps
- Valentine
- Whispered Bliss
- Wicked Princess Scraps
- Winter
- wordart
Blog Archive
-
▼
2011
(230)
-
▼
July
(27)
- Beautiful Baby Blog Train
- Summer Fun Kit- FTU
- Template 2
- The Hunter- FTU
- Template 1
- Guarding Elias- PTU
- Original Sin- PTU
- Freebie Quick Page!!!
- Flaunt It- PTU
- Tag show off
- Emo Geek- PTU
- The Artist in Me- PTU
- Ever So Grateful- PTU
- Nani Kahakai- PTU
- Libby's Lullaby- PTU
- Tut result :)
- Summer Lilac- PTU
- Dragon Princess- PTU
- Beautiful - PTU
- Glitter- PTU
- FTU CU Paper Pack 1
- Tag show off
- Heaven Can Wait- PTU
- Emotionally Yours- PTU
- Turquoise Passion- PTU
- My Little Mermaid- PTU
- Raspberry Tart- PTU
-
▼
July
(27)


