Search
Sign up for my Newsletter
Tasha's Playground Fan Page
Find me on Facebook
Followers
Tuesday, May 31, 2011
I've received an award from my girl Omneya at Omneya's World!! Go check out her blog here for some awesome goodies. Thank you so much Omz for this award! I'd like to thank all the oreos and milk that have been consumed to fuel my late night bouts of mojo, lol!!
This award is to acknowledge blogs that rock.
If you know a blog that rocks and want to give them this award
Then send them a message saying..."Your Blog Rocks".
Since I have accepted this award from Omneya's World,
I must pass it on to 5 other blogs that I think Rock.
There are no rules to this award.
Only to send it to 5 people you think deserve this award.
Make sure you leave them a message.
Labels:awards | 0
comments
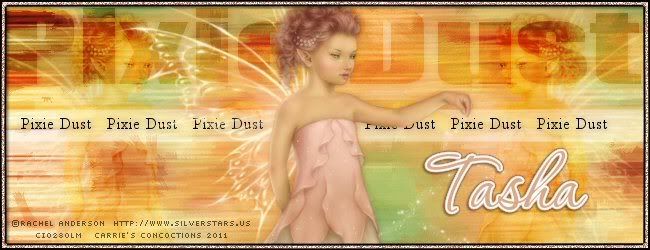
Carrie from Carrie's Concoctions tried out my "Baddest Bitch" tut and I LOVE her results!!! She used the tut as a guide and made it her own. Thank you for my set Carrie ♥
Visit Carries blog here to check out her awesome tuts and great templates!
Labels:tut result | 1 comments
Monday, May 30, 2011
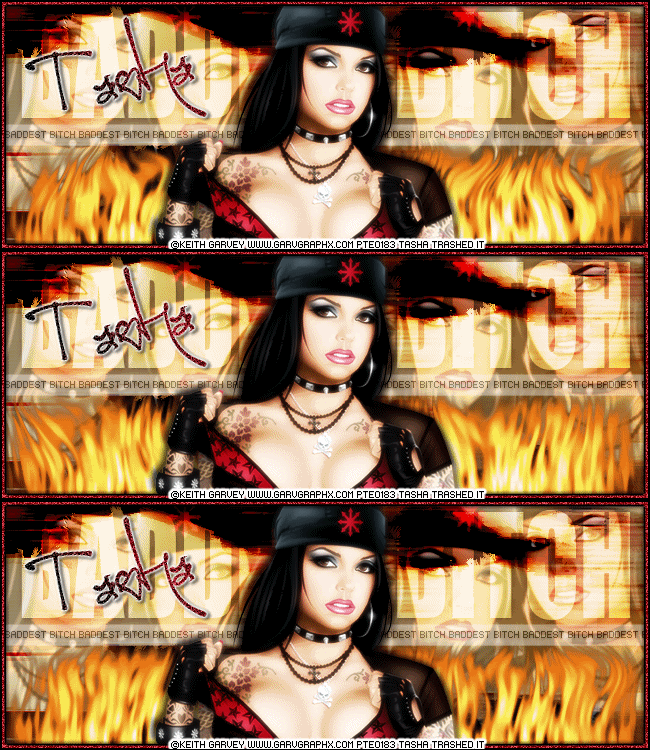
Supplies:
Tube of choice- You'll want a tube with close up. I chose Keith Garvey. You can find him at PTE. You must have a valid license to use this artwork.
Font- FFF Urban, Impact, First Lyrics
Plug Ins- Xero>radiance, Eye Candy Nature>Fire
Animation Shop
Here we go :)
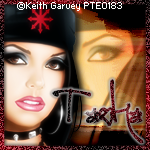
Open a new canvas 650x250
c/p your close up onto canvas
Mura Meister Copies>wallpaper
adjust settings to your preference
duplicate. Image>mirror
change blend mode ot hard light. merge visible layers
adjust>blur>motion blur:
angle 90, strength 100%
repeat
duplicate layer
On bottom layer:
Effects>art media effects>brush strokes:
On the top layer:
Effects>Edge effects>enhance more
change blend mode to screen
opacity around 86
c/p close up of tube onto canvas
duplicate and arrange to your preference
merge tube layers. duplicate
On bottom merged layer:
change blend mode to burn
opacity to 40
On duplicate merged layer:
change blend mode to hard light
opacity to 38
add main tube to canvas
resize if needed
xero>radiance. default settings, but lower beauty to around 100
duplicate main tube layer
On duplicate:
adjust>blur>gaussian blur 3
change blend mode to screen, opacity 68
drop shadow original tube layer
select your rectangle tool.
foreground color X'd out, background color white
create a rectangle near middle of canvas
lower opacity to around 40
add text of choice. add drop shadow (1, 1, 75, 5)
Now repeat those words with your Impact font
stretch words across canvas
Objects>align center
convert to raster layer
change blend mode to overlay
opacity at 68. add drop shadow (1, 1, 35, 10)
Now for the frame :)
Highlight your background layer
selections>select all>float>defloat
selections>modify>select selection borders:
Inside, 6, anti-alias checked
add new layer, flood fill with black, move to top
selections>modify>contract by 2
add new layer. Flood fill with color of choice
Adjust>add noise:
Uniform, 65%, monochrome
deselect
Highlight the black frame layer.
add drop shadow (2, 2, 40, 3) (-2, -2, 40, 3)
Now, highlight your top merged tube layer
Add 3 new raster layers, transparency locked
Highlight first layer
Eye Candy Nature>fire:
Highlight your second new layer.
Eye Candy 5 nature, same settings, but hit the Random Seed button
Repeat with the remaining new layer
Rename your layers (flame 1, 2 and 3)
Add your copyright and license info
add name and any additional text
If you aren't going to animate, merge and save now :)
For animation:
X out flame layers 2 and 3,
leave flame layer 1 open
Edit>copy merged
Open AS
Paste as new animation
Back to PSP
X out flame layer 1
unhide flame layer 2
Edit>copy merged
back to AS
paste after current frame
Back to PSP
X out flame layer 2
unhide flame layer 3
Edit>copy merged
back to AS
paste after current frame
In AS-
Edit>select all
Animation>frame properties
change the 10 to 13
View animation. If you're happy with it, save as gif
For the avi:
Duplicate your banner
hide whatever layers you don't want on your avi
rearrange banner if needed
using your crop tool, crop a 150x150 section of banner
repeat same steps for frame except set selection borders to 4
and contract by 1
once you have your avi how you want it,
add license and copyright info
merge and save
Thank you for trying my tut. If you have any questions or would like me to post your results, please email me: bananas_68@yahoo.com
Labels:animated,Forum Set,No Scrap | 0
comments
Sunday, May 29, 2011
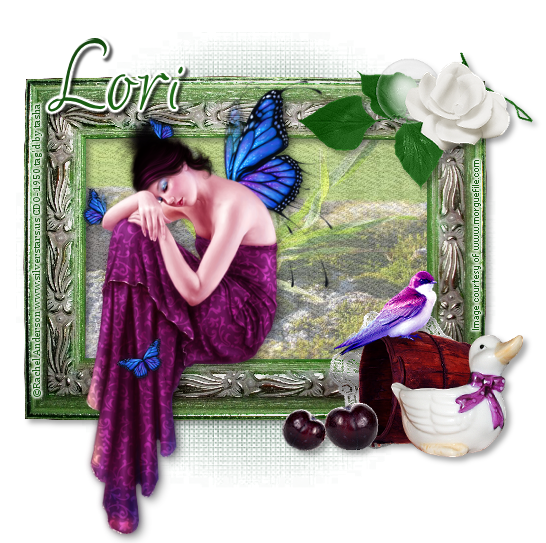
Supplies:
Kit- "Plum Passion" by P4DSDesigns. I love purple so this kit was just perfect! You can purchase this gorgeous kit at Lollipops N Gumdrops here
Mask- Chas2Mask here
Tube- I'm using a Rachel Anderson tube available at CDO. You must have a valid license to use this artwork.
Image of choice- I used an image from http://www.morguefile.com/
Font- Clarissa, a FTU font here
Here we go :)
Open a new image 650x650
c/p paper 7 onto canvas, resize
layers>new mask layer>from image
apply mask, merge group
duplicate a few times
c/p frame onto canvas
using your magic wand tool, click inside frame
selections>modify>expand by 5
c/p image of choice under frame
hit delete on your keyboard
c/p paper 10 under image
hit delete on your keyboard
deselect
change image opacity to around 52
add a soft drop shadow to frame
open tube of choice and position on tag
duplicate tube layer
on duplicate:
adjust>blur>gaussian blur at 3
change blend mode to soft light
drop shadow bottom tube layer
add elements to tag:
lace flower
leaf decor
barrel- image>rotate 90 degrees
duck
plum- duplicate, rotate, resize
bird
crop and resize your tag
add license and copyright info
add name and any text
merge, save, enjoy
Thank you for trying my tut. If you have any questions or would like me to post your results, please email me: bananas_68@yahoo.com
Labels:Lollipops N Gumdrops,PTU tut | 0
comments
Saturday, May 28, 2011
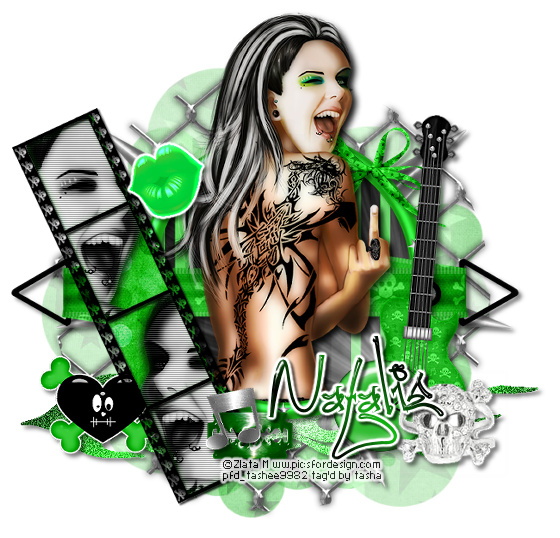
Supplies:
Kit- "Rawkin' in Green" by Candylicious Designz. This is just one in her series of 'Rawkin' in' kits. You can purchase this awesome kit at Twilight Scraps here.
Tube- You need an in your face tube with this kit! I chose to use Zlata M which you can get from PFD. You must have a valid license to use this artist.
Mask- StaciCircleMask3 here
Font- First Lyrics here
Plug Ins- UnPlugged>Interlace, Xero>Radiance
Here we go :)
Open a new image 700x700
resize and c/p paper 4 onto canvas
Layers>new mask layer>from image
apply mask, merge group
c/p frame 4 onto canvas
using magic wand tool, click inside frame
selections>modify>expand by 5
c/p paper 1 under frame
selections>invert
hit delete on keyboard deselect
Open tube of choice, place above frame layer
duplicate and place layer under frame
X out your top tube layer, select the duplicate
using your eraser tool, erase any parts below the edge of the frame
Now unhide the top tube layer, select it
and erase any parts below the edge of the frame
It should now look like your tube is coming out of the frame
c/p frame 5 onto canvas
Image>rotate>free rotate 65 degrees
magic wand tool, click inside each frame box
selections>modify>expand by 5
c/p paper 11 under frame
selections>invert
hit delete on your keyboard
deselect
Using your magic wand tool and tube close up
add parts of the tube in each box of frame 5
merge tube layers together
Apply xero>radiance
Apply UnPlugged>Interlace
add drop shadow
Now decorate your tag with elements:
flame
lightray
tie
bow3
guitar- rotate 5 degrees
element 11
skull
element 8
razor blade
note
lips
crop and resize tag
add copyright and license info
add name and any text
merge, save, enjoy!
Thank you for trying my tut. If you have any questions or would like me to post your results, please email me: bananas_68@yahoo.com
Labels:PTU tut,Twilight Scraps | 0
comments
Supplies:
Kit- I used a beautiful kit called "Peach Petals" by Scrapin' Daisy. You can find this wonderful kit at I Got Lucky Skraps here.
Tube of choice- I used a lovely Pin Up Toon which I purchased from CILM. You can now find these at CDO. You must have a valid license to use this work.
Font of choice
No mask or plug ins used!
Here we go :)
Open a new canvas 700x700
Open frame 63, resize and place in middle of canvas
Open frame 61, resize and place to left of frame 63
duplicate, mirror, arrange like in my tag
Merge frames to one layer
using your magic wand tool, click inside each frame
selections>modify>expand by 5
c/p paper 0016 under frame
selections>invert
hit delete on keyboard
add drop shadow of choice
deselect
Magic wand tool, click inside left frame
selections>modify>expand by 5
c/p tube of choice under frame
selections>invert
hit delete on keyboard
add drop shadow
duplicate and mirror
deselect
c/p element 68 onto canvas
resize, duplicate and mirror
c/p element 20 onto canvas
place under element 68
c/p element 59 onto canvas
resize, duplicate and mirror
add main tube of choice
Place above frame layer
use your eraser to get rid of any parts hanging below elements
c/p element 005 and move to the bottom
Effects>texture effects>mosaic-antique with these settings:
crop and resize your tag
add copyright and license info
add name and any text
merge, save, enjoy!
Thanks for trying my tut. If you have any questions or would like to show me your results, please email me: bananas_68@yahoo.com
Labels:PTU tut | 0
comments
Friday, May 27, 2011
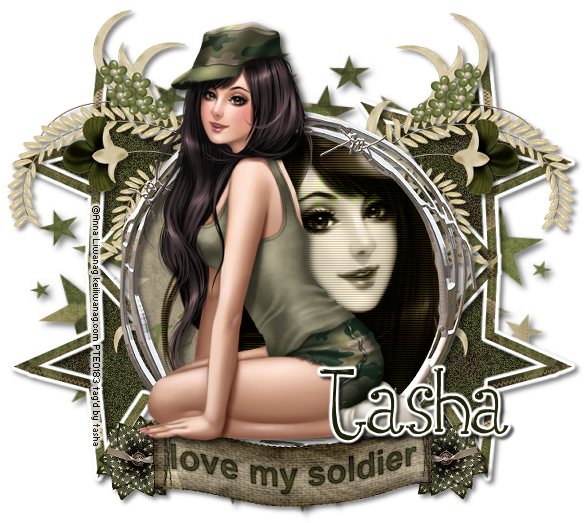
Being a military wife, I just love these kinds of tags!! And with Memorial Day coming up, I just had to do one!! If you try this tut, I would just LOVE to see your results :)
Supplies:
Kit of choice: I used "Camo" by Sky Scraps here
Tube of choice:You'll want a tube with a close-up. I used the artwork of Anna Liwanag available at PTE here. You must have a proper license to use her tubes.
Mask of choice: I used SophisticatSimone-Mask14 here
Font of choice: Impervious, a FTU font here
Plug Ins- EC4>Gradient Glow, Unplugged>Interlace
Here we go :)
Open a new canvas 750x750
c/p pp1 onto canvas
layers>new mask layer>from image
apply mask, merge group
add drop shadow
c/p frame 1 onto canvas
using your magic wand tool click inside frame
selections>modify>expand by 5
c/p pp15 as a new layer below frame
selections>invert
hit delete on your keyboard
Open your close up tube, position and hit delete
deselect
On tube layer:
blend mode Luminance (L)
Unplugged tools>interlace
default settings or what you think looks good
add drop shadow to the frame
c/p frame 2 onto canvas
duplicate, mirror, merge down
duplicate, flip
position behind frame 1
Use your magic wand tool and click inside each frame
selections>modify>expand by 5
c/p pp11 under frames
Select paper layer
adjust>add noise around 55
Select frame layer
EC4>gradient glow: fat, white, width 5
apply drop shadow of choice
c/p flower painting 2 onto canvas
duplicate and mirror
place below frame 1
add drop shadow
c/p tag2 onto canvas, top layer
add drop shadow
c/p flower 2 onto canvas below tag
add drop shadow
duplicate, mirror
Open tube of choice
add drop shadow
crop and resize tag
add license and copyright info
add name and any text info
merge, save and enjoy
Thank you for trying my tut. If you have any questions or would like me to post your results, please email me: bananas_68@yahoo.com
Labels:FTU tut | 0
comments
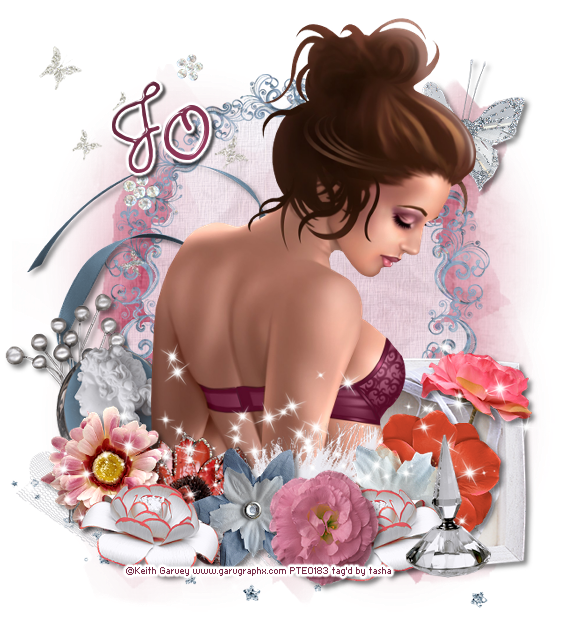
Supplies:
Kit of choice- You'll want a softer kit with lots of flowers and different elements. Jo from A Tagger's Scrap made this wonderful kit, "Sweetly", that fits the description perfectly. Visit her blog here for info on how to purchase this beautiful kit.
Mask- SD Mask#7 from Scraps Dimensions here
Tube- I'm using the amazing work of Keith Garvey. His tubes are availabe at PTE. You must have a valid license to use this work!
Font- Honeybunches, a FTU font here
Here we go :)
Open a new canvas 750x750
c/p paper 4 onto canvas
layers>new mask layer>from image
apply mask, merge group
c/p frame11 onto canvas
use magic wand and click inside frame
selections>modify>expand by 5
c/p paper 3 onto canvas
selections>invert
hit delete on keyboard, deselect
lower paper opacity to around 74
Open the following elements and place around the frame,
from bottom to top:
glitter 1
bow 4
box
tulle
deco 6
butterfly 2
deco 4
cameo
flower 12
flower 9
feather
flower 5
flower 2
sparkles 2
flower 1
flower 10
flower 11- duplicate/mirror
bottle
Open tube of choice and place behind flowers
use your eraser tool to get rid of anything hanging below
crop tag and resize
add license and copyright info
add name and any text
merge, save, enjoy
Thank you for trying my tut. If you have any questions or would like to show me your results, please email me: bananas_68@yahoo.com
Labels:A Tagger's Scrap,PTU tut | 0
comments
Thursday, May 26, 2011
Kit- I'm using "Hot Stuff" by Wicked Princess Scraps here. This kit is full of sexy, dangerous elements that will delight your dark side! Visit her blog for info on where you can purchase this kit.
Tube- There were so many tube choices that matched this kit!! I chose to use the artwork of Zlata M. You can get this tube from PFD. You must have the proper license to use this artwork.
Mask- DeviantDesigner Mask 3 here
Template- Temp49 by Leah at Amy & Leah's Gimptastic Tuts here. It is part of their Anti-Valentines templates
Font- Devil Breeze, a FTU font here
Plug Ins- Xero>Fritillary, Xero>Radiance, Tramages>Tow the Line, EC4>Gradient Glow
Here we go :)
Open your template, ctrl+d, close out original template
I resized all layers and then increased
the canvas size to have some room to work with :)
Delete the first 5 layers
Highlight rect 8
selections>select all>float>defloat
c/p pp14 onto canvas
selections>invert
hit delete on your keyboard, deselect
EC4>gradient glow: fat, white, width 3
repeat the above steps with rect 7
Highlight circle layer
selections>select all>float>defloat
c/p pp13 onto canvas
selections>invert
hit delete on your keyboard, deselect
EC4>gradient glow, same settings as above
Highlight rect 6
selections>select all>float>defloat
add new raster layer, flood fill with #0000000
Xero>Fritillary:
Highlight frame 4
Adjust>add/remove noise>add noise:
Uniform, 50%, monochrome checked
Highlight rect 5
selections>select all>float>defloat
c/p pp2 onto canvas
selections>invert
hit delete on your keyboard, deselect
EC4>gradient glow: black halo, width 3
repeat the above with rect 4
Highlight rect 3
selections>select all>float>defloat
add new raster layer
flood fill with #0000000
apply Xero>radiance, same settings
Repeat with rect 2
Highlight rect 1
Tramages>Tow the Line, default settings
Now add some elements to your tag:
flame- duplicate/mirror/EC4>gradient glow
black rose- duplicate/mirror
skull and crossbones
candelabra
cup
heart pill
devilish heart
Add tube of choice
Xero>radiance: default settings, beauty around 75
EC4>gradient glow: width 3, fat, play with the colors a bit :)
Duplicate tube
on copy layer:
Gaussian blur 3, blend mode soft light
drop shadow bottom tube layer
select bottom layer.
either flood fill with color of choice or paper
layers>new mask layer>from image
apply mask, merge group
crop and resize if needed
add copyright and license info
add name and any text
merge, save, enjoy :)
Thank you for trying my tut. If you have any questions or would like to show me your results, email me: bananas_68@yahoo.com
Labels:PTU tut | 0
comments
Brandi from Grunge & Glitter is having an amazing sale!! Buy her entire store for just $25!!! That's 34 CU products, 48 kits (TS), and 13 various items!! FOR JUST $25!!!!!
BUT THAT'S NOT ALL!!!!!!
Shani at Wicked Princess Scraps will throw 5 of her own kits in the mix!! How awesome is that????
Head on over to Grunge & Glitter for more details.
Then hightail it to Wicked Princess Scraps for those extra 5 kits.
Hurry up!! You don't want to miss out on this incredible sale!!!
Wednesday, May 25, 2011
Supplies:
Kit- I used "Summer Esplendor" by Seachell's Scrapz. This vibrant, summery kit is available at Lollipops N Gumdrops here
Tube- I used a beautiful tube by Edward Reed. This artwork is available at PTE. You must have a valid licence to use this artist's work.
Mask- I used WSL_Mask116 here
Font- Baby bowser, a FTU font here
Here we go :)
Open a new canvas 750x750
c/p paper 7 onto canvas
layers>new mask layer>from image
apply mask, merge group
lower opacity to around 65
Choose a frame of choice as your base to decorate around.
I chose element 27
drop shadow (0, 0, 50, 100)
c/p the following elements, adding drop shadows as needed
(4, 4, 35, 8)
18
48
51
49
47- duplicate mirror
37
4
59
65- rotate, duplicate a few times
38
67
32
Now open your tube of choice
add drop shadow
(4, 4, 50, 14)
crop and resize tag
add license and copyright info
add name and any text
merge, save, enjoy
Thanks for trying my tut. If you have any questions or would like me to post your results, please email me: bananas_68@yahoo.com
Labels:PTU tut | 0
comments
My friend Leah from Just Peachy Scraps has just started selling at So Sweet Scraps!!! Go check her out, she has some great stuff!! And she has a huge Moving In Sale going on right now!! Be sure to check out and follow her blog for some great freebies as well!! Congrats on your new project Leah!!!!!!! Click the ad above to go to the sale, click her blinkie below to check out her blog :)
Monday, May 23, 2011
Supplies:
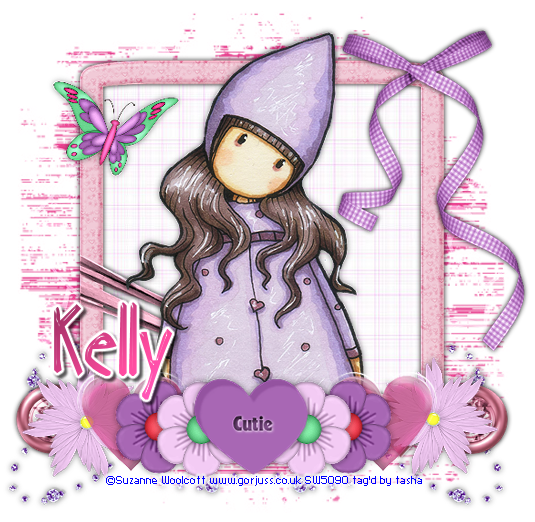
Kit- "Eclectic Hearts", a super cute kit by Scraps by Storm. This kit is available at I Got Lucky Skraps here. With shades of pinks, purples, blue and green this kit goes with almost any theme!
Tube- With this adorable kit, I had to use a Gorjuss girl! You can find these lovelies here. You must have a valid license to use this artwork.
Mask- 59InsatiableDreams available here (part of Masks 4)
Font- Too Many Secrets, a FTU font here
Here we go :)
This is going to be quick and easy!
Open a new canvas 700x700
c/p paper 20 on canvas
layers>new mask layer>from image
apply mask, merge group
open frame 5
using your magic wand tool, click inside frame
selections>modify>expand by 5
c/p paper 3 under frame
selections>invert
hit delete on keyboard
deselect
add tube of choice
duplicate
on top layer adjust>blur>gaussian blur @ 3
change blend mode to soft light
drop shadow bottom tube layer
decorate your tag with elements:
blings doodle 4- duplicate/mirror/flip
heart and diamonds 4
bow 4
flower 12-duplicate/mirror
glass heart 2- duplicate/mirror
flower 4- duplicate/mirror
flower 1- duplicate/mirror
conversation heart
crop and resize
add license and copyright info
add name and any text
merge and save
Thank you for trying my tut! If you have any questions, or would like to show me your results, please email me- bananas_68@yahoo.com
Labels:PTU tut | 0
comments
Subscribe to:
Posts
(Atom)
Leave me some love
Labels
- A Space Between
- A Tagger's Scrap
- Abstract Creations
- Alena Lazareva
- Andreea Cernestean
- animated
- Announcement
- Autumn
- Autumn Blaze
- Autumn Breeze
- awards
- Birthstone Series
- blog train
- Cartoon Pink
- CDO
- Christmas
- Cluster Frame
- CT call
- Ct Tag
- Ct Team
- Cuddly Rigor Mortis
- dark/goth
- Designer Scraps
- Digital Chaos
- Dirk Richter
- DSI
- Elias Chatzoudis
- Enys Guerrero
- FB Timeline Cover
- Fluff
- Forum Set
- FourXDesigns
- freebie
- FTU CU
- FTU kit
- FTU tut
- Full Size Kit
- Gimptastic Scraps
- Gorjuss
- Halloween
- IB kit
- Keith Garvey
- KiwiFireStorm
- Lollipops N Gumdrops
- Molly Harrison
- New Years
- No Scrap
- PFD
- Photoshop tut
- Pimpin PSPers
- Previously Released
- PTE
- PTU CU
- PTU kit
- PTU tut
- quick page
- Rebecca Sinz
- Rosanna Castellino
- sale
- Sarah's Tags N Things
- Scrap-U-Nique
- Shawli
- Sheena Pike
- snaggable
- Soxsational Scraps
- Spazzd Art
- spring
- St. Patrick's Day
- Standalone kits
- summer
- Summer Haze
- tag show off
- tags
- tags with my kits
- tags with my templates
- Tasha's CT
- template
- Thanksgiving
- TPP
- tut result
- Twilight Scraps
- Valentine
- Whispered Bliss
- Wicked Princess Scraps
- Winter
- wordart
Blog Archive
-
▼
2011
(230)
-
▼
May
(22)
- I got an award!!
- Tut result ♥
- Baddest Bitch- No scraps
- Plum Fairy- PTU
- Rawkin' - PTU
- Just Peachy- PTU
- Love My Soldier- FTU
- Sweetly- PTU
- Hot Stuff- PTU
- Buy Grunge and Glitter's store..plus more!!
- May Flowers- PTU
- Moving In Sale!!!!
- Cutie- PTU
- Little Miss Red- PTU
- Sweet Summertime- FTU
- Sweet Summer Day- PTU
- Beauty in the Breakdown- PTU
- Under the Boardwalk- PTU
- Always- FTU
- Blue Without You-PTU
- Funkilicious- PTU
- As Time Goes By- PTU
-
▼
May
(22)


