Find my kits here

Tasha's Playground Fan Page
Find me on Facebook
My Personal CT


Tuesday, May 17, 2011
Supplies:
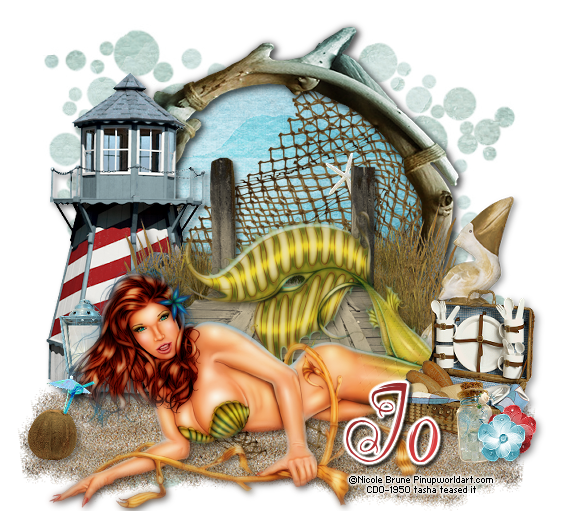
Kit of choice- I'm using a jam packed kit by Jo at A Tagger's Scrap. You can find what stores she sells at by visiting her blog here. This beachy/ocean themed kit has 157 elements and 30 papers!! A must have for the summer :)
Mask of choice- I used MakeAMaskCircleMF04Slow2011 by Sabine for Creative Misfits here
Tube of choice- I'm using the beautiful work of Nicole Brune. This tube can be purchased from CDO. Don't use this artwork without the proper license!
Font- I'm Bored, a FTU font here
Plug Ins- Xero>Porcelain
Here we go :)
Open a new canvas 750x750
c/p paper13 onto canvas
Layers>new mask layer>from image
apply mask. merge group
c/p frame3
using your magic wand tool, click inside frame
selections>modify>expand by 5
c/p paper 14 as a new layer under frame
selections>invert
hit delete on your keyboard
deselect
c/p net2 onto canvas
place inbetween frame and paper layer
c/p sand onto canvas
duplicate a few times and reposition under paper layer
c/p tube onto canvas
resize and position on sand
duplicate tube layer
on bottom layer apply xero>porcelain
default settings w/ blue channel on zero
on top tube layer, adjust>blur>gaussian blur @ 3
change blend mode to soft light
drop shadow bottom tube layer
Decorate your tag with elements. I used:
lighthouse 2
starfish 3
boardwalk 3
pelican
lantern
picnic set
jar
flower 4
flower 3
drink
Now crop and resize your tag
add copyright and license info
add name and any other text
merge, save and enjoy!
Thank you for trying my tut. If you have any questions or would like to show me your results, please email me: bananas_68@yahoo.com
Subscribe to:
Post Comments
(Atom)
My Blinkies


I Get Creative For

0 comments:
Post a Comment