Search
Sign up for my Newsletter
Tasha's Playground Fan Page
Find me on Facebook
Followers
Saturday, April 14, 2012
Supplies-
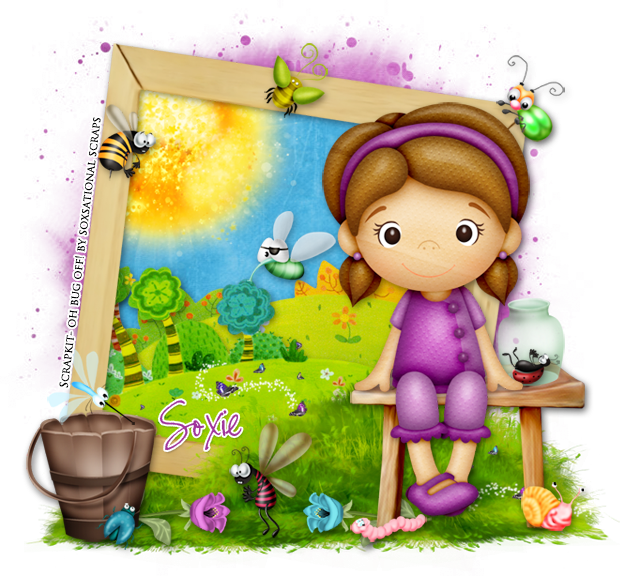
Kit: I'm using a super cute kit by Soxsational Scraps called Oh Bug Off. You can find this kit at Designer Scraps here.
Mask: Splatter Mask by Sue from the Misfits blog here
Font: Susie's Hand or font of choice
Photoshop CS5 or program of choice
I use a Mac, so when I use Command you may need to use Ctrl
Here we go :)
Open a new canvas 700x700, transparent background.
Open Frame 1 and place in center of canvas.
Below the frame, place the following elements from bottom to top
(resize and drop shadow as you go along and refer to my tag for placement):
paper 8
sun
forest- Edit>Transform>Flip horizontal
forest 2
Now activate your magic wand tool (w) and click inside the frame.
Select>Modify>Expand by 5. Select>Inverse.
Click on each of your element layers and hit delete.
This will get rid of excess pieces outside the frame.
Now place one of the grass mounds in front of the frame (I used mound 1),
duplicate, resize and flip it and place the copy directly behind the frame.
Use your eraser tool to get rid of any any parts of the copy that are showing inside the frame.
Add the stool element to the left side of the frame and sit the girl on it.
Now decorate your tag with elements from the kit.
Resize, angle and drop shadow as you go along.
From bottom to top I used:
flower 7
flower 4
bucket
jar 2
bug- 24, 23, 20, 16, 15, 11, 9, 6, 5, 1
Now let's get our mask ready! Open your mask on a new canvas.
Add a new layer above it, and flood fill with color of choice,
or use a paper from kit (I used paper 5).
Make sure your mask layer is activated and Command+A to Select All, Command+C to Copy.
Activate the paper layer, hit Q to turn on Quick Mask mode.
Command+V to paste the mask..it should now be tinted red.
Hit Q to turn off Quick Mask mode and there should now be marching ants on your canvas.
Hit the Add Layer Mask button at the bottom of the layer palette (rectangle with the circle in it)
Right click- convert to smart object
Right click- Rasterize layer
Drag completed mask to your tag canvas as the bottom layer
Resize it if needed.
Crop, trim and resize your tag.
If you used a tube not provided in the kit, add your license and copyright info.
If you didn't, add the kit info :)
Add name and any text.
Merge, save as PNG, enjoy!
Thank you for trying my tut! If you have any questions or would like to show me your results, feel free to email me- bananas_68@yahoo.com
Labels:Designer Scraps,PTU tut
Subscribe to:
Post Comments
(Atom)
Leave me some love
Labels
- A Space Between
- A Tagger's Scrap
- Abstract Creations
- Alena Lazareva
- Andreea Cernestean
- animated
- Announcement
- Autumn
- Autumn Blaze
- Autumn Breeze
- awards
- Birthstone Series
- blog train
- Cartoon Pink
- CDO
- Christmas
- Cluster Frame
- CT call
- Ct Tag
- Ct Team
- Cuddly Rigor Mortis
- dark/goth
- Designer Scraps
- Digital Chaos
- Dirk Richter
- DSI
- Elias Chatzoudis
- Enys Guerrero
- FB Timeline Cover
- Fluff
- Forum Set
- FourXDesigns
- freebie
- FTU CU
- FTU kit
- FTU tut
- Full Size Kit
- Gimptastic Scraps
- Gorjuss
- Halloween
- IB kit
- Keith Garvey
- KiwiFireStorm
- Lollipops N Gumdrops
- Molly Harrison
- New Years
- No Scrap
- PFD
- Photoshop tut
- Pimpin PSPers
- Previously Released
- PTE
- PTU CU
- PTU kit
- PTU tut
- quick page
- Rebecca Sinz
- Rosanna Castellino
- sale
- Sarah's Tags N Things
- Scrap-U-Nique
- Shawli
- Sheena Pike
- snaggable
- Soxsational Scraps
- Spazzd Art
- spring
- St. Patrick's Day
- Standalone kits
- summer
- Summer Haze
- tag show off
- tags
- tags with my kits
- tags with my templates
- Tasha's CT
- template
- Thanksgiving
- TPP
- tut result
- Twilight Scraps
- Valentine
- Whispered Bliss
- Wicked Princess Scraps
- Winter
- wordart
Blog Archive
-
▼
2012
(213)
-
▼
April
(45)
- New Garv snags!!!!!
- New tuts from my CT!!!!
- Flowers & Showers
- Gina King Snags!!!
- New CT tuts!!
- New CT tuts and a tut result :)
- Scott Blair snags!
- New CT and tut!!!
- FTU CU Paper Templates!!
- UVD tag and snags :)
- Tut Results!
- Lady in Blue- PTU
- Red Hot- No scraps banner
- Emerald Eyez tag/snags!
- Tut Results
- Some CT Goodies!!!
- CT Call!!!! April 18- April 25
- Creeped- PTU
- Gold Rush- FTU
- Golden Kiss- PTU
- Wanted! Extras
- Oh Bug Off- PTU
- Beach Babe- FTU tut
- New tuts, tags and a freebie Facebook cover!!
- Broken- FTU tut
- Freebie Alert!!! Facebook Timeline Cover!
- CT tut and tag show offs!
- Tut Results
- FTU CU Grab Bag!!!
- Roman Zaric tag & snags
- City Gurl- PTU tut
- Summer Heat- FTU tut
- New CT tut!!
- A Midnight Kiss- PTU
- Juicy Snapshot- PTU
- I've joined a new CT :D
- CT tags and tuts!!
- Tut Result
- Bunny Luv- FTU
- Denim Daze- PTU
- New CT tuts!!
- SWAK- PTU tut
- FTU CU Texture Pack
- New PTU kit!!
- O'Scrap Blog Train Has Left the Station!!!
-
▼
April
(45)


Thanks Tasha for this lovely tutorial.
ReplyDeleteI've done it!
Happy day!
Rosa.
Lindo mesmo!!
ReplyDeleteparabéns