Find my kits here

Tasha's Playground Fan Page
Find me on Facebook
My Personal CT


Sunday, September 25, 2011
Supplies-
Tube- I'm using a cute little tube by Grafik available for purchase at PFD
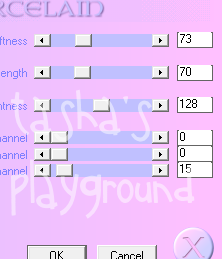
Plug Ins- Xero>Porcelain, dsb flux>spider web, Filter Factory B>Cut Glass
Fonts- Abaddon and Some Weatz Swashes, both FTU
Animation Shop
Here we go :)
Create a new canvas whatever size you like your banners. I did mine 600x200
Flood fill with color or gradient of choice that matches your tube
I did a gradient, angle 25, repeats 4
duplicate this layer
on top layer, apply Filter Factory B>Cut Glass:
Number of 44, Transparency of 25
change blend mode to Dodge
Add close up of tube, duplicate and mirror
duplicate, reposition and mirror
repeat this until you've filled up the banner with close ups
merge tube layers layers
change blend mode to screen, opacity 40
Move this below your Cut Glass layer
Activate your preset tool, rectangle
change foreground color to null, background white
Draw out a rectangle the width of your banner
it's ok if it goes over the edges, we'll crop in a sec
convert to raster layer and change blend mode to soft light
Activate your text tool and using the Abaddon font, type out Happy Halloween
Convert to raster layer and apply a fat, white gradient glow-width 3
change blend mode to 82
Activate your preset tool, square, line width 4
change foreground color to black, background null
Draw out a square inside your banner, convert to raster layer
Image>rotate>free rotate 45 degrees
Adjust>add noise 60%
Using your magic wand tool, click inside your frame
selections>modify>expand by 3
add new raster layer below frame and flood fill with color of choice
c/p tube close up as a new layer below frame
selections>invert
hit delete on keyboard, deselect
Apply Xero>Porcelain to tube close up:
Add main tube of choice
Duplicate
On top layer, adjust>blur>gaussian blur 2
change blend mode to Hard Light, opacity 50
Duplicate, change blend mode to Screen, opacity 42
apply drop shadow to bottom tube layer
Crop your banner
activate bottom layer
selections>select all>float>defloat
selections>modify>select selection borders:
Inside, width 4
add new raster layer, flood fill with color of choice
add noise at 60%, move layer to the top
Apply drop shadow (1, 1, 50, 2 then -1, -1, 50, 2)
add your license and copyright info
add name and any additional text
if you aren't going to animate, go ahead and save :)
To animate:
Remember that first layer you duplicated? Activate it.
It should be your very bottom layer.
Apply DSB Flux>Spider Web:

Edit>copy merged
Over to Animation shop and paste as a new animation
Head back to PSP and hit Undo
Reapply Spider Webs, but increase the Rays to 20
Edit>copy merged
Over to AS and paste after current frame
Repeat the steps above, increasing the Rays each time by 5
I did it until I got to 35, but you can do as little or as much as ya want!
In AS, select all frames
change frame properties to 15
Save as GIF, and enjoy :)
Thank you for trying my tut. If you have any questions or would like to show me your results, feel free to email me: bananas_68@yahoo.com
Subscribe to:
Post Comments
(Atom)
My Blinkies


I Get Creative For

Great tut! Thanks!
ReplyDeleteawesome tut, thanks so much ♥
ReplyDelete